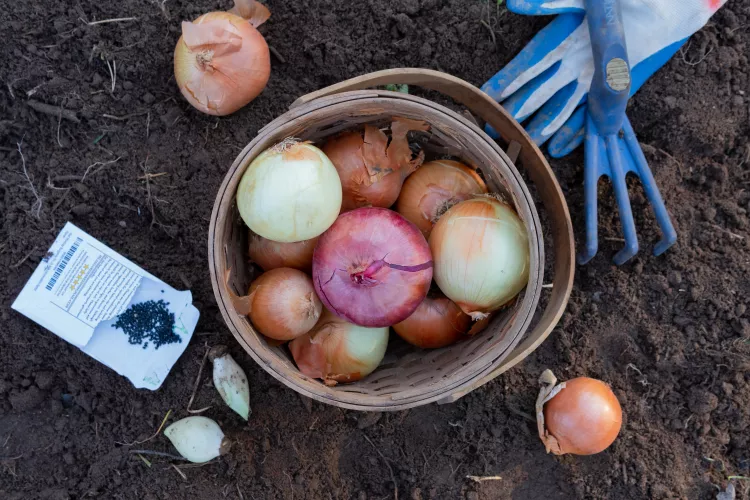
There’s something incredibly satisfying about growing your own onions. Whether you’re adding them to your favorite dishes or storing them for winter, homegrown onions are a kitchen staple that’s hard to beat. When I first started growing onions, I was amazed at how easy they were to cultivate and how rewarding it was to harvest my own crop.
If you’re ready to grow your own onions, you’re in the right place. In this guide, I’ll walk you through everything you need to know about planting, caring for, and harvesting onions. Let’s get started!
Why Grow Onions?
Onions are not only versatile in the kitchen but also packed with nutrients like vitamins, antioxidants, and fiber. Growing your own onions allows you to:
- Enjoy fresh, organic onions.
- Save money compared to store-bought varieties.
- Experience the satisfaction of cultivating your own food.
Step 1: Choose the Right Onion Variety
There are several types of onions to choose from, each with its own unique characteristics. Here are a few popular options:
- Yellow Onions: Versatile and great for cooking.
- Red Onions: Sweet and perfect for salads and grilling.
- White Onions: Mild and ideal for Mexican cuisine.
- Sweet Onions: Mild and perfect for eating raw.
Day Length Considerations
- Long-Day Onions: Best for northern regions with 14-16 hours of daylight.
- Short-Day Onions: Ideal for southern regions with 10-12 hours of daylight.
- Day-Neutral Onions: Suitable for most regions.
Step 2: Planting Onions
Onions thrive in well-draining soil and plenty of sunlight. Here’s how to get started:
When to Plant
- Plant onions in early spring as soon as the soil can be worked.
- For a fall harvest, plant onions in late summer or early fall.
Where to Plant
- Sunlight: Choose a spot that receives at least 6 hours of direct sunlight daily.
- Soil: Well-draining, fertile soil with a pH of 6.0-7.0 is ideal.
- Space: Plant sets or seeds 4-6 inches apart in rows spaced 12-18 inches apart.
How to Plant
- Prepare the soil by adding compost or aged manure.
- Plant onion sets or seeds 1 inch deep.
- Cover with soil and water thoroughly.
Step 3: Watering and Fertilizing
Onions need consistent moisture, especially during bulb formation.
Watering
- Water deeply once a week, ensuring the soil stays moist but not waterlogged.
- Reduce watering as the bulbs mature to prevent rot.
Fertilizing
- Apply a balanced fertilizer (10-10-10) at planting time.
- Side-dress with nitrogen-rich fertilizer 3-4 weeks after planting.
Step 4: Managing Pests and Diseases
Onions can be susceptible to pests and diseases, so it’s important to take preventive measures.
Common Problems
- Pests: Onion thrips and onion maggots. Use insecticidal soap or neem oil.
- Diseases: Downy mildew and onion rot. Ensure good air circulation and avoid overhead watering.
Prevention Tips
- Rotate crops to prevent soil-borne diseases.
- Keep the garden clean and free of debris.
Step 5: Harvesting Onions
Onions are ready to harvest when the tops have fallen over and started to dry.
How to Harvest
- Gently lift the onions from the soil with a fork.
- Allow them to dry in the sun for a few days.
Curing and Storing
- Cure onions in a warm, dry place for 2-3 weeks.
- Store in a cool, dark place with good air circulation.
Step 6: Saving Onion Seeds
Want to grow onions again next year? It’s easy to save seeds!
How to Save Seeds
- Allow a few onions to bolt and produce flowers.
- Collect the seeds once the flower heads have dried.
Final Thoughts
Growing onions is a rewarding experience that brings fresh, flavorful produce to your table. With the right care, these hardy plants will thrive and provide you with a bountiful harvest. So go ahead, plant some onions, and enjoy the many benefits they have to offer!


+ There are no comments
Add yours