When I first considered adding a high tunnel to my small farm, I was torn between building one myself or buying a pre-made kit. Both options have their pros and cons, and the choice ultimately depends on your budget, skills, and needs. Over time, I’ve learned the ins and outs of both approaches, and I’m excited to share my knowledge with you.
If you’re thinking about adding a high tunnel to your farm or garden, you’re in the right place. In this guide, I’ll walk you through everything you need to know about building or buying a high tunnel, from planning to installation. Let’s dive in!
What Is a High Tunnel?
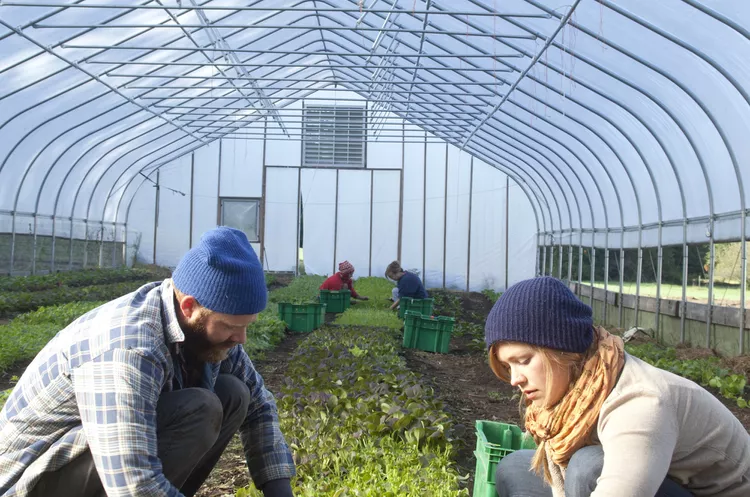
A high tunnel, also known as a hoop house, is a semi-circular or square structure covered with polyethylene plastic. It’s unheated and relies on natural sunlight to create a controlled environment for crops. High tunnels are a cost-effective way to extend the growing season, protect plants from harsh weather, and improve yields.
Step 1: Planning Your High Tunnel
Before you start building or buying, it’s important to plan your high tunnel carefully.
Determine Your Needs
- Purpose: Are you growing vegetables, flowers, or specialty crops?
- Size: Consider the amount of space you need and the crops you plan to grow.
- Location: Choose a site with good drainage, full sun exposure, and easy access to water and electricity.
Budget
- DIY: Building your own high tunnel can save money but requires time and skills.
- Pre-Made Kits: Buying a kit is more expensive but offers convenience and professional design.
Step 2: Building Your Own High Tunnel
If you’re handy and have some construction experience, building your own high tunnel can be a rewarding project.
Materials Needed
- Frame: Galvanized steel or PVC pipes.
- Covering: UV-resistant polyethylene plastic.
- Anchors: Ground posts or concrete footings to secure the structure.
- Tools: Drill, wrench, level, and measuring tape.
Construction Steps
- Prepare the Site: Level the ground and mark the layout.
- Assemble the Frame: Follow a detailed plan or design your own. Secure the frame with anchors.
- Install the Covering: Stretch the plastic over the frame and secure it with wiggle wire or clips.
- Add Ventilation: Install roll-up sides or roof vents for temperature control.
Pros of Building Your Own
- Cost-effective.
- Customizable to your specific needs.
Cons of Building Your Own
- Time-consuming.
- Requires construction skills and tools.
Step 3: Buying a High Tunnel Kit
If you prefer a hassle-free option, buying a high tunnel kit is a great choice.
What to Look for in a Kit
- Quality: Choose a kit made from durable materials like galvanized steel.
- Size: Select a size that fits your needs and available space.
- Features: Look for kits with ventilation options, UV-resistant plastic, and easy assembly instructions.
Popular High Tunnel Kit Brands
- FarmTek: Offers a wide range of sizes and customizable options.
- Rimol: Known for durable, easy-to-assemble kits.
- Gothic Arch Greenhouses: Specializes in high-quality, affordable kits.
Pros of Buying a Kit
- Convenient and easy to assemble.
- Professionally designed and tested.
Cons of Buying a Kit
- More expensive than DIY.
- Limited customization options.
Step 4: Installing Your High Tunnel
Whether you build or buy, proper installation is key to ensuring your high tunnel is functional and durable.
Site Preparation
- Clear the area of debris and level the ground.
- Ensure proper drainage to prevent water pooling.
Anchoring the Structure
- Use ground posts or concrete footings to secure the frame.
- Ensure the structure is level and stable to withstand wind and snow loads.
Covering the Frame
- Stretch the plastic tightly to prevent sagging and improve light transmission.
- Secure the plastic with wiggle wire, clips, or batten tape.
Step 5: Managing Your High Tunnel
Once your high tunnel is installed, proper management is essential for success.
Ventilation
- Use roll-up sides or roof vents to regulate temperature and humidity.
- Install fans or exhaust systems for better air circulation.
Irrigation
- Drip irrigation is ideal for high tunnels, as it conserves water and reduces disease risk.
- Install a rainwater collection system to supplement your water supply.
Soil Health
- Rotate crops to prevent soil-borne diseases and nutrient depletion.
- Add compost or organic matter to improve soil fertility.
Final Thoughts
Whether you choose to build or buy a high tunnel, it’s a valuable investment that can transform your farm or garden. High tunnels extend the growing season, protect crops from harsh weather, and improve yields—all while being cost-effective and environmentally friendly. So go ahead, take the plunge, and start enjoying the benefits of a high tunnel today!


+ There are no comments
Add yours